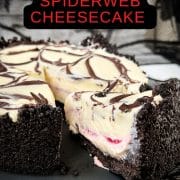
This white chocolate cheesecake with its "bloody" raspberry filling is the perfect, spooky treat to help you celebrate All Hallows' Eve! Whether you're planning to host an unforgettable Halloween Bash, or you just want a little something sweet to slice into after Trick-Or-Treaking with your little ones, this recipe is sure to deliver spooktacular flavors!
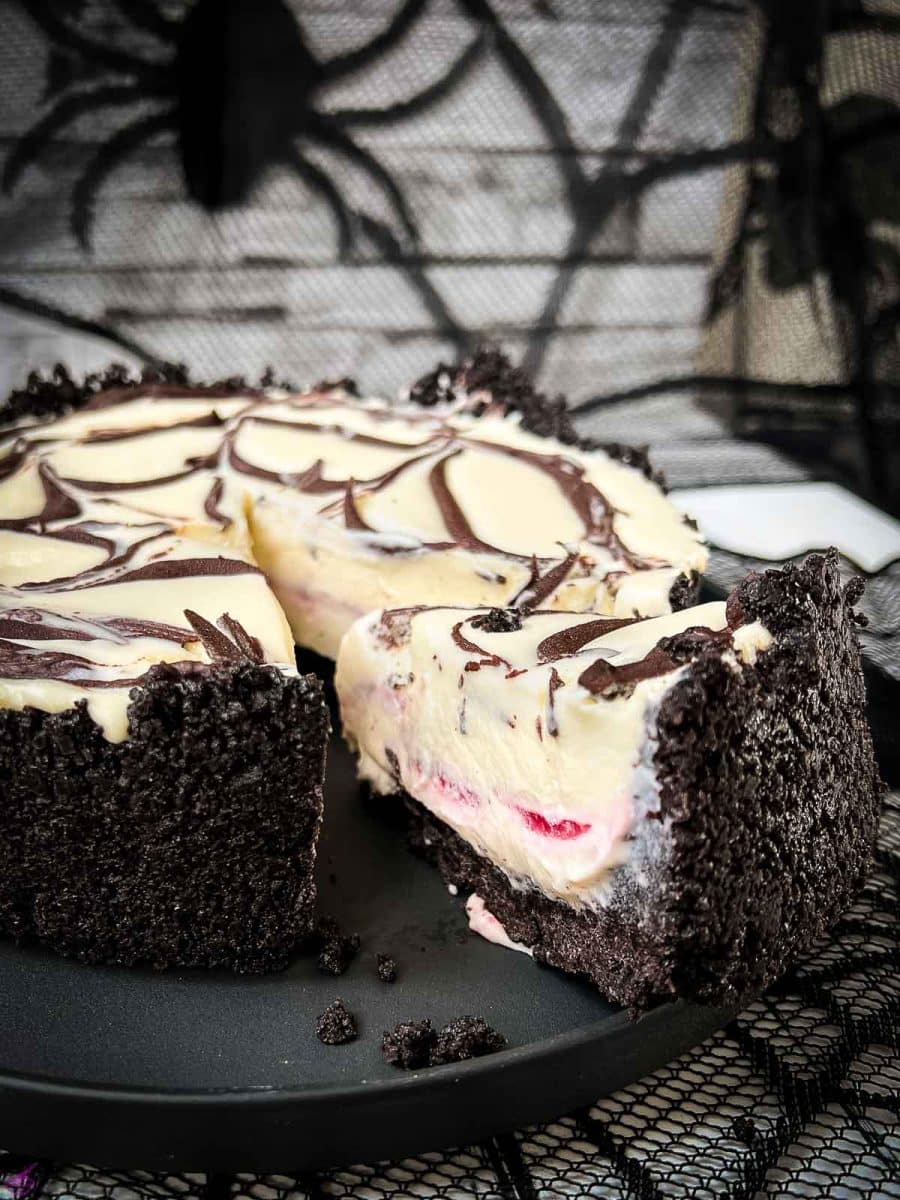
This no-bake Halloween cheesecake's spooky surprise filling might appear crimson, but it's so easy to whip together that you won't need to pour your blood, sweat, and tears into it! I promise this recipe's "hardest" part is making the fresh homemade raspberry sauce, but it's nothing to be scared of! That little extra touch will be greatly appreciated is in every bite of this creamy white chocolate cheesecake.
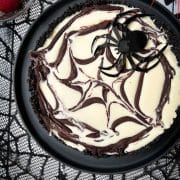
You'll be bewitched by the delightfully dark contrast of the black Oreo crust alongside the light cheesecake cream and fall in love with the hauntingly beautiful spider web design. This cake will feel like magic, since it can be prepared in a snap – leaving you plenty of time to plan all your ghoulish games and party snacks!
This spooky cheesecake is simply to die for!
All puns aside, I had a great time creating this beautiful Halloween cheesecake, and I hope you love it as much as my little girl did last year!
If you really want to be on theme this Halloween, I recommend serving this spooky cheesecake alongside some fun drinks, like this red Halloween cocktail or a Halloween punch after all the little ones have gone to bed, of course!
Jump to:
🥘 Ingredients

Raspberry sauce
- Fresh raspberries
- Sugar
- Water
- Cornstarch

Cheesecake cream
- Full fat cream cheese
- Confectioner's sugar
- Vanilla extract
- Fresh lemon juice
- Heavy whipping cream
- White chocolate - chopped

Spider's web
- Milk chocolate or dark chocolate
- Heavy whipping cream
See the recipe card for quantities.
🔪 Instructions
Step 1 - Preparation
First, prepare a round springform pan with baking paper on the bottom. Lightly spray the sides of the pan with non-stick spray and set aside.
Step 2 - The Oreo cookie dough
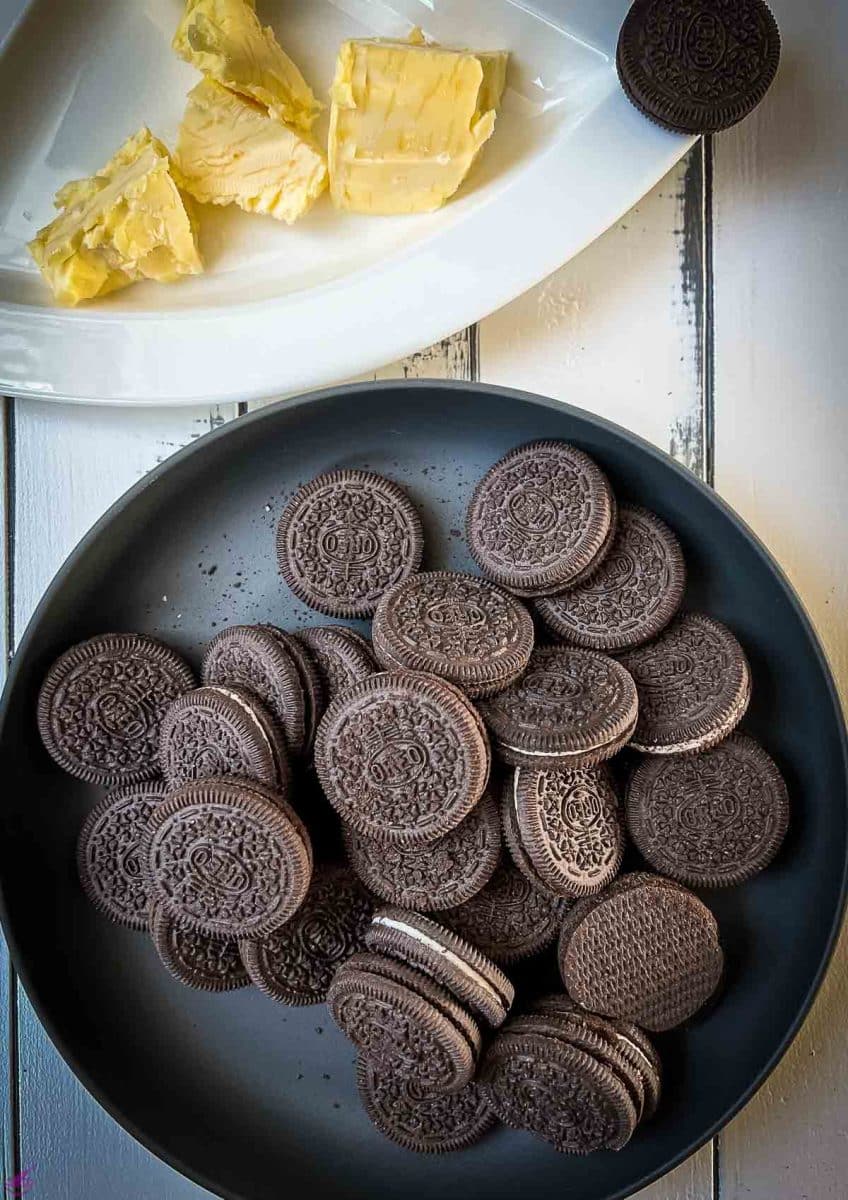
Grab those yummy Oreo cookies, put them in a food processor, and process them into fine cookie crumbs. Along the way, slowly melt the unsalted butter in a small pan.
If you don't have a food processor to crush the Oreos, put the cookies in a ziplock bag and crush them using a rolling pin. A fantastic way to release pent-up anger in the kitchen. 😀
Add the crumbled cookie pieces to the food processor along with the melted butter and process on high until the cookie crumbs stick to the sides of the food processor.
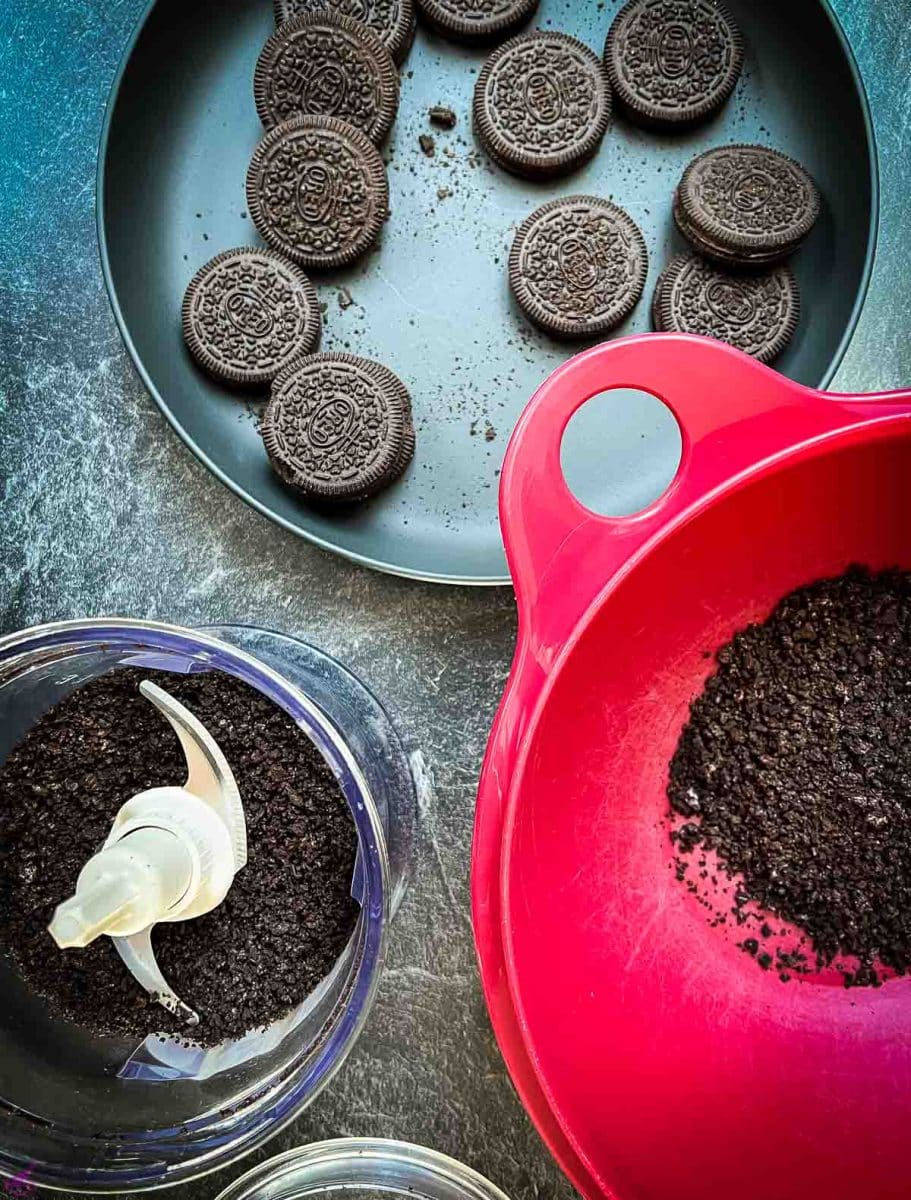
Process Oreo cookies into fine cookie crumbs.
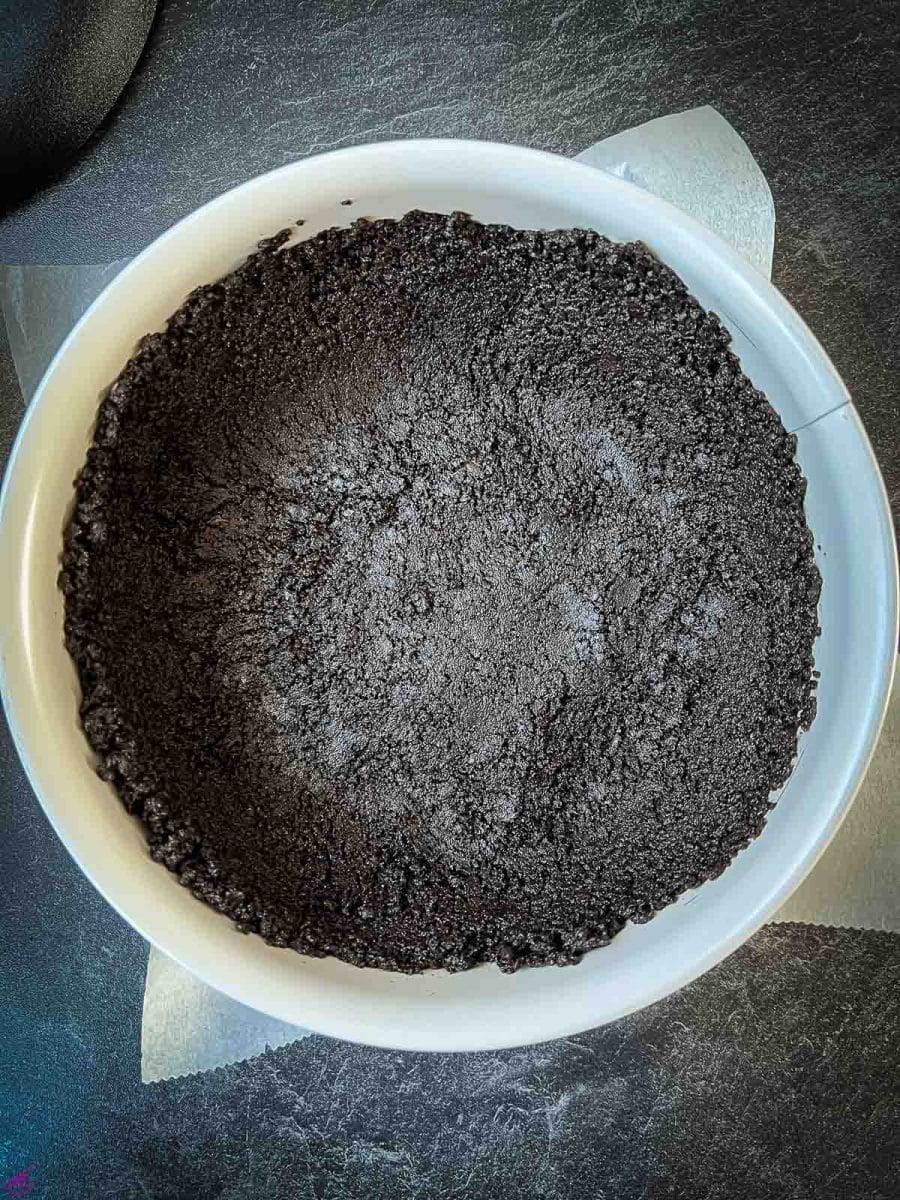
Press the Oreo dough firmly into the springform pan.
In the end, the mixture will have a sand-like consistency and can be crushed with your fingers.
Now you will need the prepared springform pan. Empty the Oreo mixture into it and press the Oreo dough firmly into the springform pan.
Spread it over the bottom and sides of the pan to create a nice, even shape. Place the filled pan in the refrigerator for 15 minutes to cool.
Step 3 - Raspberry sauce
Place your fresh raspberries, three tablespoons of water, and the granulated sugar in a sauce pot and heat over medium heat.
Once the mixture starts bubbling, loosen the raspberries with a rubber spatula or spoon.

Bubbling raspberry mixture.
Stir occasionally to break up the berries, and make sure all ingredients are well mixed.
In a small separate bowl, whisk together one tablespoon of cold water and the cornstarch until completely dissolved.
Add this mixture to the raspberry sauce and stir. Bring to a boil briefly, then reduce the heat to a simmer.
The sauce will thicken within 2-3 minutes. You can tell it's ready when it sticks to the back of a spoon.
Press the prepared sauce through a fine mesh strainer to remove the seeds from the sauce. What remains is a lovely, smooth raspberry sauce. Set it aside to cool.
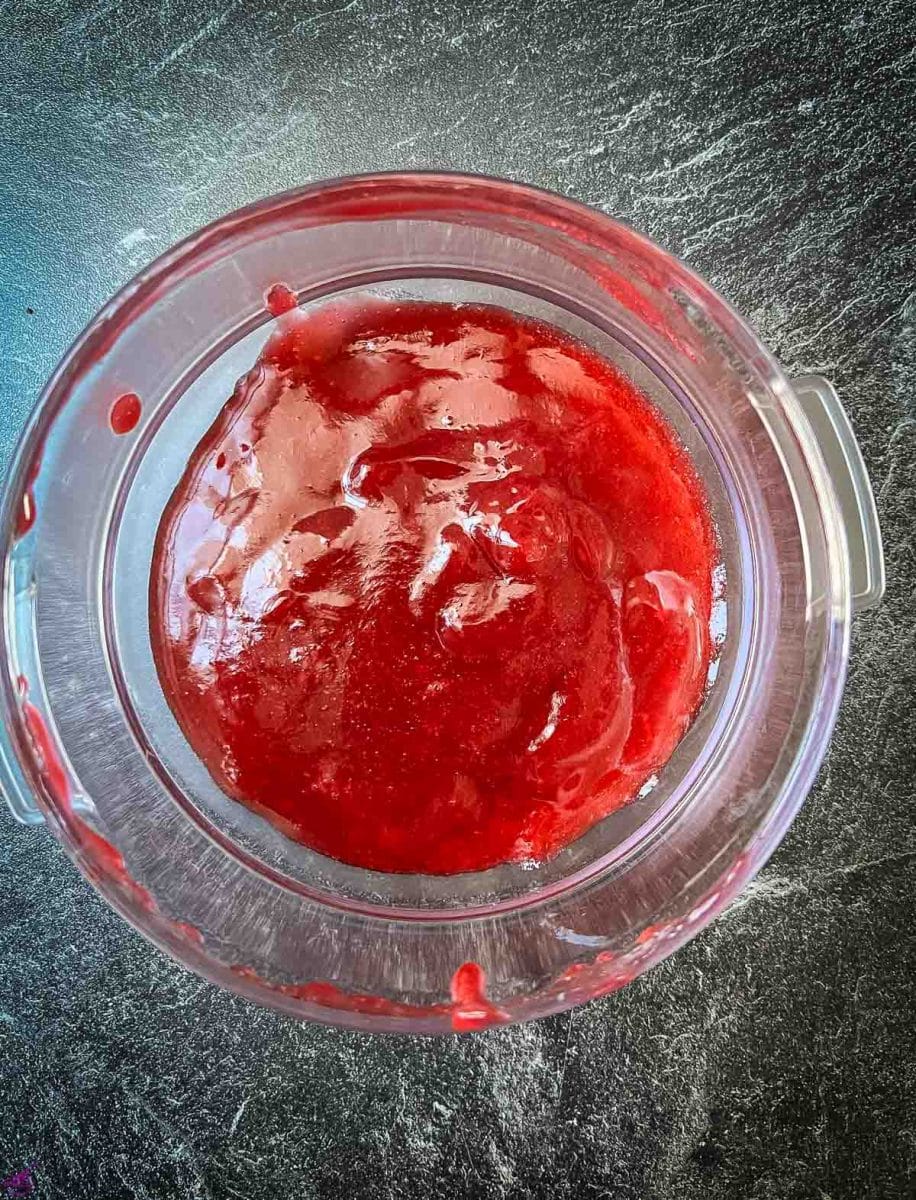
Finished raspberry sauce.
Step 4 - The cheesecake filling
Place the cream cheese in the bowl of your stand mixer. If you're not using a stand mixer, put it in a deep, large bowl with enough room to whip.
Whisk the cream cheese until it is completely smooth and fluffy, scraping down the sides as needed, about 3-4 minutes.
If there are still small lumps, let the cream cheese sit for another 10-15 minutes, then whip again until smooth.
Meanwhile, squeeze half a lemon. Add the powdered sugar, vanilla, and two tablespoons of lemon juice to the bowl and beat on medium speed until the mixture is fluffy (it takes between 3 and 5 minutes).
You'll need a medium bowl and a glass measuring cup for the white chocolate ganache, which you will incorporate into the cheesecake mixture. Add half of the cream (60 ml / ¼ cup) to the measuring cup and microwave for 1 minute or until heated; be careful not to overcook.
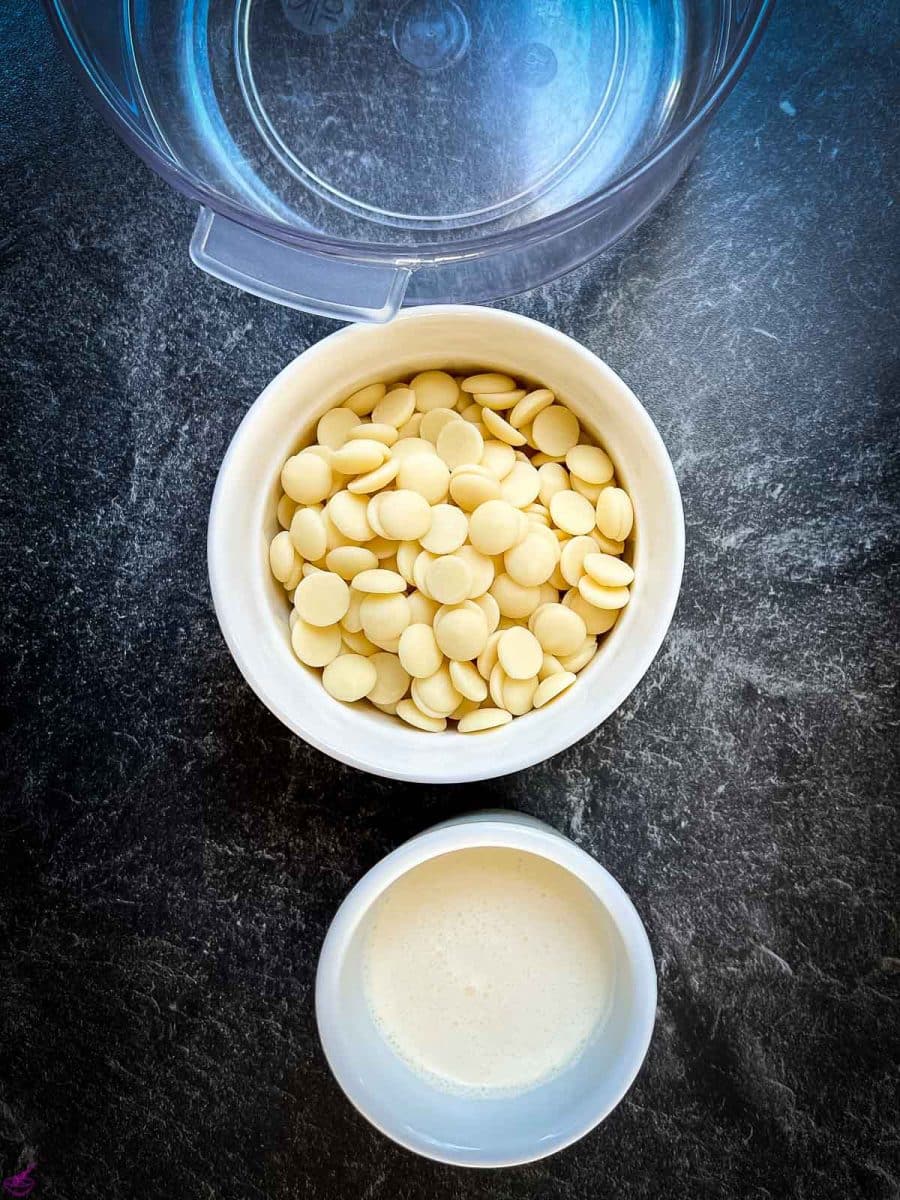
White chocolate and heated whipped cream.
Place the white chocolate in a bowl and pour the cream over the white chocolate. Whisk quickly with a fork to melt the white chocolate into a smooth, pourable mixture.
If the white chocolate still has lumps, microwave for ten more seconds to ensure it is melted entirely. Be careful not to overheat the white chocolate.
Turn the mixer to medium speed and slowly pour the white chocolate into the cheesecake mixture until thoroughly blended. Now add the remaining whipped cream. Mix it again until everything is well combined.
Step 5 - Assemble the cheesecake
Remove the chilled crust from the refrigerator. Pour half of the cheesecake mixture into the crust and gently smooth it to cover the bottom.

Pour half of the cheesecake mixture into the crust.
Place in the freezer for 10 minutes to allow the mixture to set and firm up.
Remove the cake from the freezer and spoon the raspberry sauce onto the cheesecake mixture. Gently spread it out using a spoon.
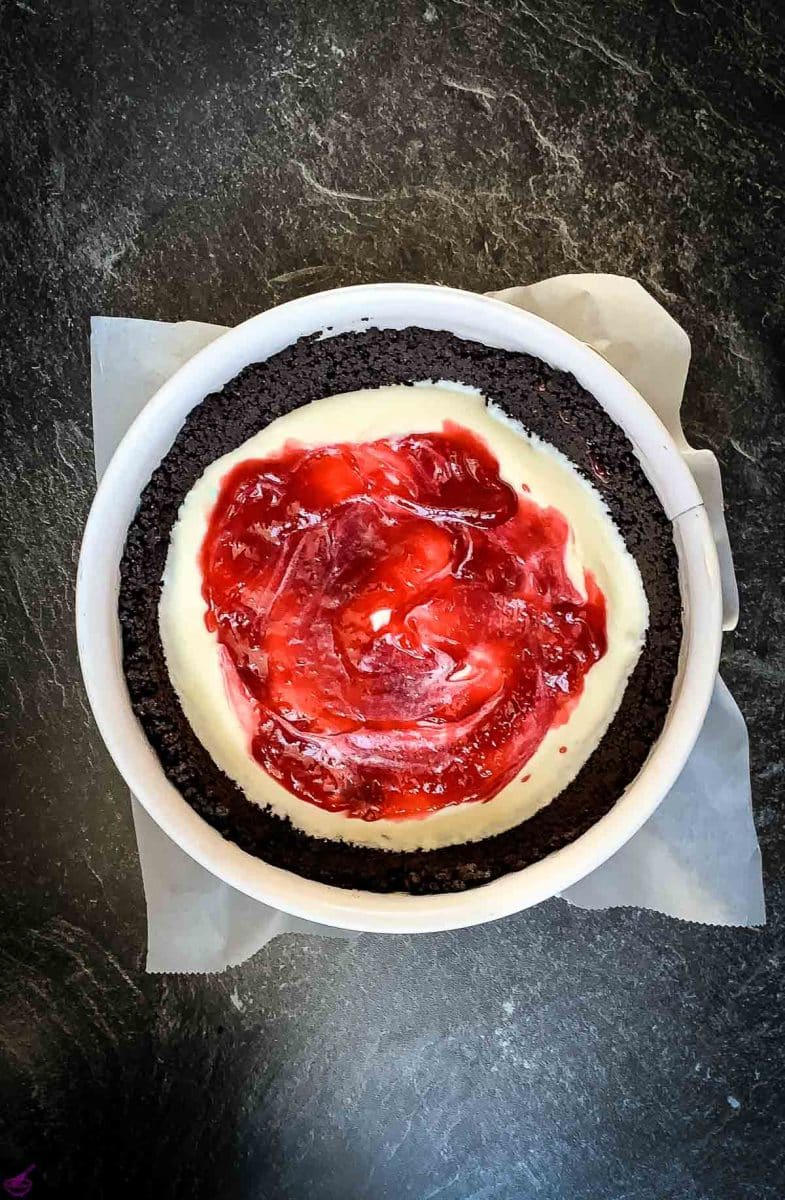
Spoon the raspberry sauce onto the cheesecake mixture.
Carefully spoon the remaining cheesecake mixture on top of the raspberry layer. Be careful not to mix the layers here.
A little trick for getting a smooth top layer: Moisten the back of a spoon with water.
Hold the spoon underwater and shake off the excess water. When the spoon is wet, the cheesecake mixture will no longer stick and will be easier to smooth.
Repeat wetting the spoon as needed to prevent sticking while you smooth the top layer.
Step 6 - The spider web
Place four tablespoons of whipped cream in a measuring cup and microwave for 45 seconds.
If you want to use dark chocolate for the spider web, I recommend using six tablespoons of heavy cream.
Put the chocolate in a medium bowl and pour the hot cream over it. Stir the mixture with a fork until you have a smooth, thick ganache.
Pour the chocolate ganache into a cake-decorating piping bag to shape the net.
To make filling easier, place the piping bag in a tall container to free both hands.
Once filled, cut off the tip of the bag and make a dot in the center of the cheesecake.
Pipe a large circle on top of the cheesecake and repeat the process, leaving about ½-inch/ 1.2cm of space between the circles.
Now drag from the ganache's center dot to the cheesecake's outer edge a line (using the tip of a knife or a toothpick).
Repeat every 1-inch/2.5cm, making sure the circles are slightly curved to create a spider web.
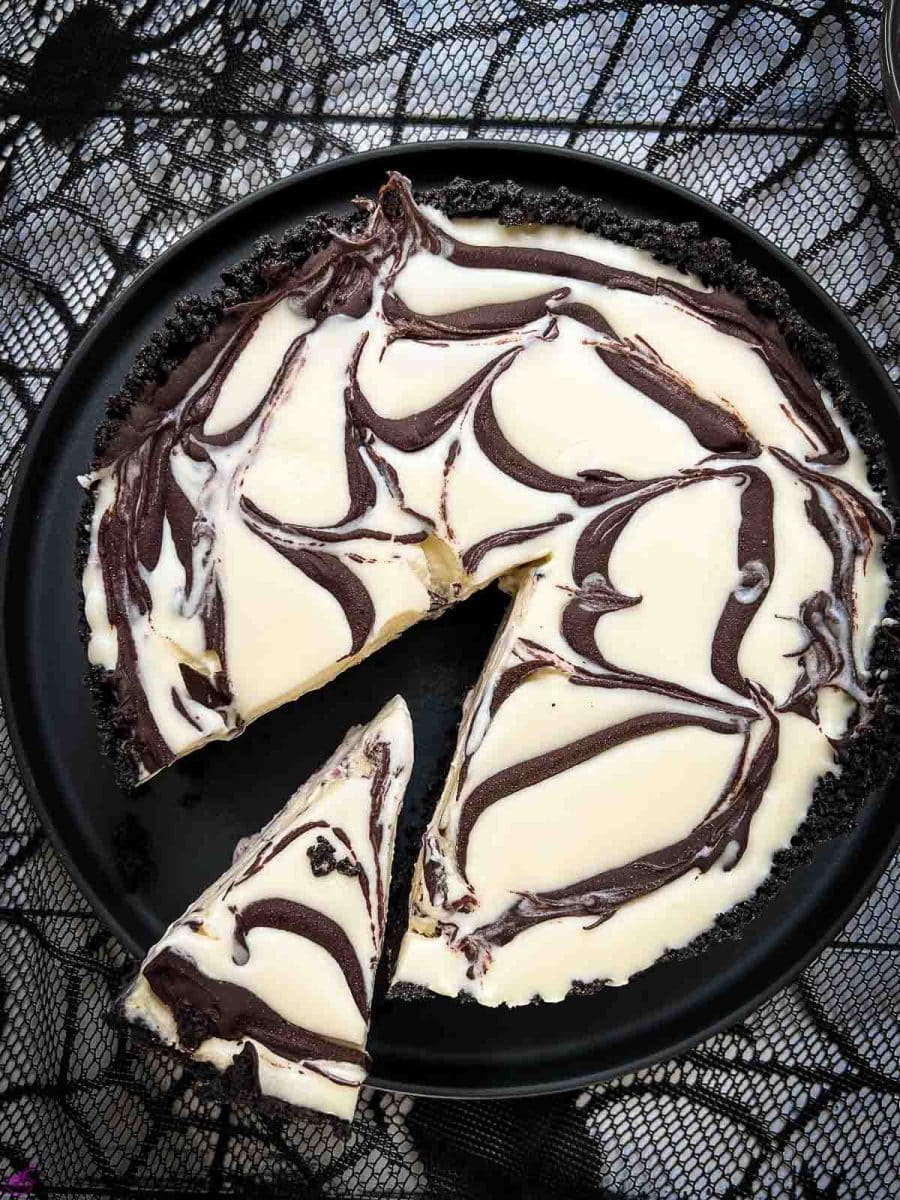
Cut into slices.

Serve chilled.
Refrigerate for at least 6 hours to prevent the cheesecake from becoming too runny. Overnight is ideal. Serve this wonderful chocolate raspberry cheesecake chilled.
Fancy more delicious no-bake cheesecake recipes? Check out the following:
- No-bake Ricotta Cheesecake
- No-bake Pumpkin Cheesecake
- No-bake Fig Cheesecake in a Jar
- No-bake Mint Chocolate Cheesecake
- No-bake 4th of July Cheesecake
- No-bake Eggnog Cheesecake with Ginger Spiced Crust
- 5 ingredient mini Oreo Cheesecakes
- No-bake Strawberry Cheesecake
- Cheesecake Pudding Pie (created by whenisdinner.com)
🥜 Substitutions
To make this no-bake Halloween cheesecake gluten-free, substitute a gluten-free alternative for the Oreo cookies.
People with fructose intolerance can also replace the Oreo cookies with a cookie variety that does not contain fructose, as, unfortunately, Oreo cookies contain fructose syrup.
I did not experience discomfort while eating the cheesecake, but everyone's body is different. If you are very sensitive to fructose, substitute the cookies to be on the safe side.
Additionally, when making the raspberry sauce, you can add a teaspoon of dextrose to make it more digestible.
🍽 Equipment
- 9-inch springform pan (23 cm)
- Baking paper
- Food processor
- Mixing bowls
- Small saucepan
- Small pan
- Close-meshed sieve
- Glass measuring cup
- Lemon squeezer
- Tablespoon
- Fork
- Pastry bag
🌡 Storage
This Halloween cheesecake will keep for 3-5 days in the refrigerator.
You can also freeze it after assembling it.
Make sure that you take it out of the springform pan first after the first 6 hours of cooling and then freeze it. Wrap it in plastic wrap or use an airtight container for freezing.
👻 More Spooky Recipes for You to Try
- Spiderweb cookies
- Red Halloween Cocktail
- Limoncello Vodka
- Kraken with Ginger Beer
- Halloween Cocktails {roundup}
- Gosling's Dark & Stormy
- Kraken Cola
- Kramble
- Spooky Tarts
- Sloe Screw
💭 Top tip
Before you start adding any ingredients, the cream cheese must be lump-free. Therefore, ensure it is not too cold when preparing it and is well whipped with a food processor or by hand.

🙋🏻 FAQ
Yes, raspberries and chocolate are a classic combination! The tangy zest of fresh raspberries is the perfect contrast to chocolate's rich and creamy taste. Dark chocolate is one of the best pairings, but even white chocolate and raspberry is a great duo!
You don't need to worry about throwing anything into the oven for this no-bake, spooky cheesecake! Even the crust can be whipped together without needing to be baked.
This particular cheesecake should only be kept in the fridge for three to five days. If you want to make this spooky treat well in advance of Halloween, though, you could also freeze it after assembling everything.
One simple thing you can do to help enhance the raspberries' flavor is to add a little bit of lemon juice. This particular, no-bake cheesecake actually calls for a little bit of fresh lemon juice to help make the creamy filling.
If you make this recipe, let me know how you liked it by ★★★★★ star rating it and leaving a comment below. This would be awesome! You can also sign up for our Newsletter or follow me on Pinterest or Instagram and share your creation with me. Just tag me @combinegoodflavors and hashtag #combinegoodflavors, so I don't miss it.
📖 Recipe
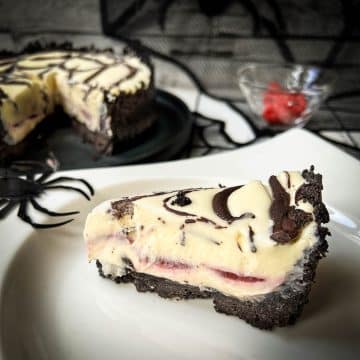
No Bake Chocolate Raspberry Cheesecake (Halloween Cheesecake)
Equipment
- 9-inch springform pan ( 23 cm)
- Baking Paper
- Small Saucepan
- Small pan
- Tablespoon
- Fork
Ingredients
Raspberry Sauce
- 6 oz Fresh raspberries
- ⅓ cup Sugar
- ¼ cup Water divided
- 1 tablespoon Cornstarch
Cookie Crust
- 35 Oreos
- 7 tablespoon Butter salted
Cheesecake Cream
- 24 oz Cream cheese
- 1 ¼ cup Confectioner's sugar
- 1 tablespoon Vanilla extract
- 2 teaspoon Fresh lemon juice
- ½ cup Whipped cream divided
- 1 cup White chocolate chopped
Spiderweb
- 6 oz Milk chocolate or dark chocolate
- 6 tablespoon Whipped cream
Instructions
Step 1 - Preparation
- Prepare a round springform pan with baking paper on the bottom. Lightly spray the sides of the pan with non-stick spray and set aside.
Step 2 - The Oreo cookie dough
- Place 35 Oreos in a food processor, and process them into fine cookie crumbs. In the meantime, slowly melt 7 tablespoon Butter in a small pan.35 Oreos
- Add the crumbled cookie pieces to the food processor along with the melted butter and process on high until the cookie crumbs stick to the sides of the food processor.7 tablespoon Butter
- The mixture will have a sand-like consistency and can be crushed with your fingers.
- Empty the Oreo mixture into it and press the Oreo dough firmly into the springform pan. Spread it over the bottom and sides of the pan to create a nice even shape.
- Place the filled pan in the refrigerator for 15 minutes to cool.
Step 3 - Raspberry sauce
- Place 6 oz Fresh raspberries, three tablespoons of water, and ⅓ cup Sugar in a sauce pot and heat over medium heat.6 oz Fresh raspberries, ¼ cup Water, ⅓ cup Sugar
- Once the mixture starts bubbling, loosen the raspberries with a rubber spatula or spoon.
- In a small separate bowl, whisk together one tablespoon of cold water and 1 tablespoon Cornstarch until completely dissolved.1 tablespoon Cornstarch, ¼ cup Water
- Add this mixture to the raspberry sauce and stir. Bring to a boil briefly, then reduce the heat to a simmer.
- The sauce will thicken within 2-3 minutes.
- Press the prepared sauce through a fine mesh sieve to remove the seeds from the sauce. What remains is a lovely, smooth raspberry sauce.
- Set it aside to cool.
Step 4 - The cheesecake filling
- Place 24 oz Cream cheese in the bowl of your stand mixer.24 oz Cream cheese
- Whisk the cream cheese until it is completely smooth and fluffy, scraping down the sides as needed, about 3-4 minutes.
- Meanwhile, squeeze half a lemon.2 teaspoon Fresh lemon juice
- Add 1 ¼ cup Confectioner's sugar, 1 tablespoon Vanilla extract, and 2 teaspoon Fresh lemon juice to the bowl and beat on medium speed until the mixture is fluffy.1 ¼ cup Confectioner's sugar, 1 tablespoon Vanilla extract, 2 teaspoon Fresh lemon juice
- Add half of ½ cup Whipped cream (60 ml / ¼ cup) to the measuring cup and microwave for 1 minute or until heated.½ cup Whipped cream
- Place 6 oz Milk chocolate1 cup White chocolate in a bowl and pour the cream over the white chocolate. Whisk quickly with a fork to melt the white chocolate into a smooth, pourable mixture.1 cup White chocolate
- Turn the mixer to medium speed and slowly pour the white chocolate into the cheesecake mixture until thoroughly blended.
- Add the remaining whipped cream. Remix it until everything is well combined.½ cup Whipped cream
Step 5 - Assemble the cheesecake
- Remove the chilled crust from the refrigerator. Pour half of the cheesecake mixture into the crust and gently smooth it to cover the bottom.
- Place in the freezer for 10 minutes to allow the mixture to set and firm up.
- Remove the cake from the freezer and spoon the raspberry sauce onto the cheesecake mixture. Gently spread it out using a spoon.
- Carefully spoon the remaining cheesecake mixture on top of the raspberry layer. Be careful not to mix the layers here.
Step 6 - The spider web
- Place 6 tablespoon Whipped cream in a measuring cup and microwave for 45 seconds.6 tablespoon Whipped cream, 6 oz Milk chocolate
- If you want to use dark chocolate for the spider web, I recommend using six tablespoons of heavy cream.
- Put 6 oz Milk chocolate in a medium bowl and pour the hot cream over it. Stir the mixture with a fork until you have a smooth, thick ganache.
- Pour the chocolate ganache into a cake decorating piping bag to shape the net.
- Once filled, cut off the tip of the bag and make a dot in the center of the cheesecake.
- Pipe a large circle on top of the cheesecake and repeat the process, leaving about ½-inch/ 1.2cm of space between the circles.
- Now drag from the ganache's center dot to the cheesecake's outer edge a line (using the tip of a knife or a toothpick).
- Repeat every 1-inch/2.5cm, making sure the circles are slightly curved to create a spider web.
- Refrigerate for at least 6 hours to prevent the cheesecake from becoming too runny. Overnight is ideal. Serve chilled.
Nutrition values are estimates only, using online calculators. Please verify using your own data.

⛑️ Food Safety
- Cook to a minimum temperature of 165 °F (74 °C)
- Do not use the same utensils on cooked food, that previously touched raw meat
- Wash hands after touching raw meat
- Don't leave food sitting out at room temperature for extended periods
- Never leave cooking food unattended
- Use oils with high smoking point to avoid harmful compounds
- Always have good ventilation when using a gas stove
For further information, check Safe Food Handling - FDA.

















Giangi Townsend says
Wow!! That looks amazing. Perfect for the Halloween party that I am preparing to have next month. I love the oreo cookies crust. Thank you for sharing. Cannot wait to make it.
Sara says
I love the idea of a hidden fruity surprise. The raspberry would taste so good with an oreo crust!