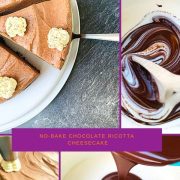
No-Bake Chocolate Ricotta Cheesecake


Have you ever tried a cheesecake with ricotta? If not, then you should try this no-bake chocolate ricotta cheesecake without cream cheese and with a scrumptious Biscoff cookie base!
You will love it! And it may even happen to you, as it did to me, that you will find yourself using ricotta exclusively for your no-bake cheesecakes in the future!

Why you’ll love this no-bake chocolate ricotta cheesecake
This cheesecake is a winner for any occasion! I particularly like the fact on this one, that you can prepare it the day before serving. That’s why I think it’s perfect for festive meals where you want to prepare a lot in advance. Like at Christmas, to have less to do on Christmas Day.
Terrific is this cake in summer as well, when it’s hot, and you don’t want to stand in front of a hot oven but enjoy a delicious cake for dessert.
🥘 Ingredients

Biscoff Crust
- Lotus Biscoff Cookies
- Unsweetened Cocoa Powder
- Melted unsalted butter
Chocolate Ricotta Cream
- Milk chocolate Couverture (chopped)
- Dark Chocolate Couverture (chopped)
- Gelatin
- Ricotta
- Granulated Sugar
- Heavy Cream
- Milk
Decoration
- Heavy Cream
- 1 tsp Cornstarch
- 1 tsp Powdered Sugar
- Unsweetened Cocoa Powder for dusting
See the recipe card for quantities.
Get your chocolate couverture at Prime Chocolate and save 10 % with the code ThankYouNora

🔪 Instructions
Necessary Preparations to save you time
Before you can start creating your wonderful cheesecake, there are a few small preparations to make that will make your life so much easier.
- Take your springform pan and line it with baking paper (cut to size on the bottom and sides). Set it aside.
- Melt the butter in a small pan on low heat, and set up two water baths to melt the light and dark couverture separately. After melting the couverture completely, pour each into a separate bowl and let them cool down a bit.
- Soak the gelatin leaves in cold water.
With these preparations, you’ll be much faster. You won’t have to stand around and wait afterward when you already want to make the milk chocolate and dark chocolate cream.
Making the delicious Lotus Biscoff cookie cake base
Since I am a fan of the Lotus Biscoff cookies, I prefer using them for the base. These cookies additionally provide an excellent, unmistakable caramel flavor! Simply delicious! But if you fancy, you can opt for chocolate cookies here instead.
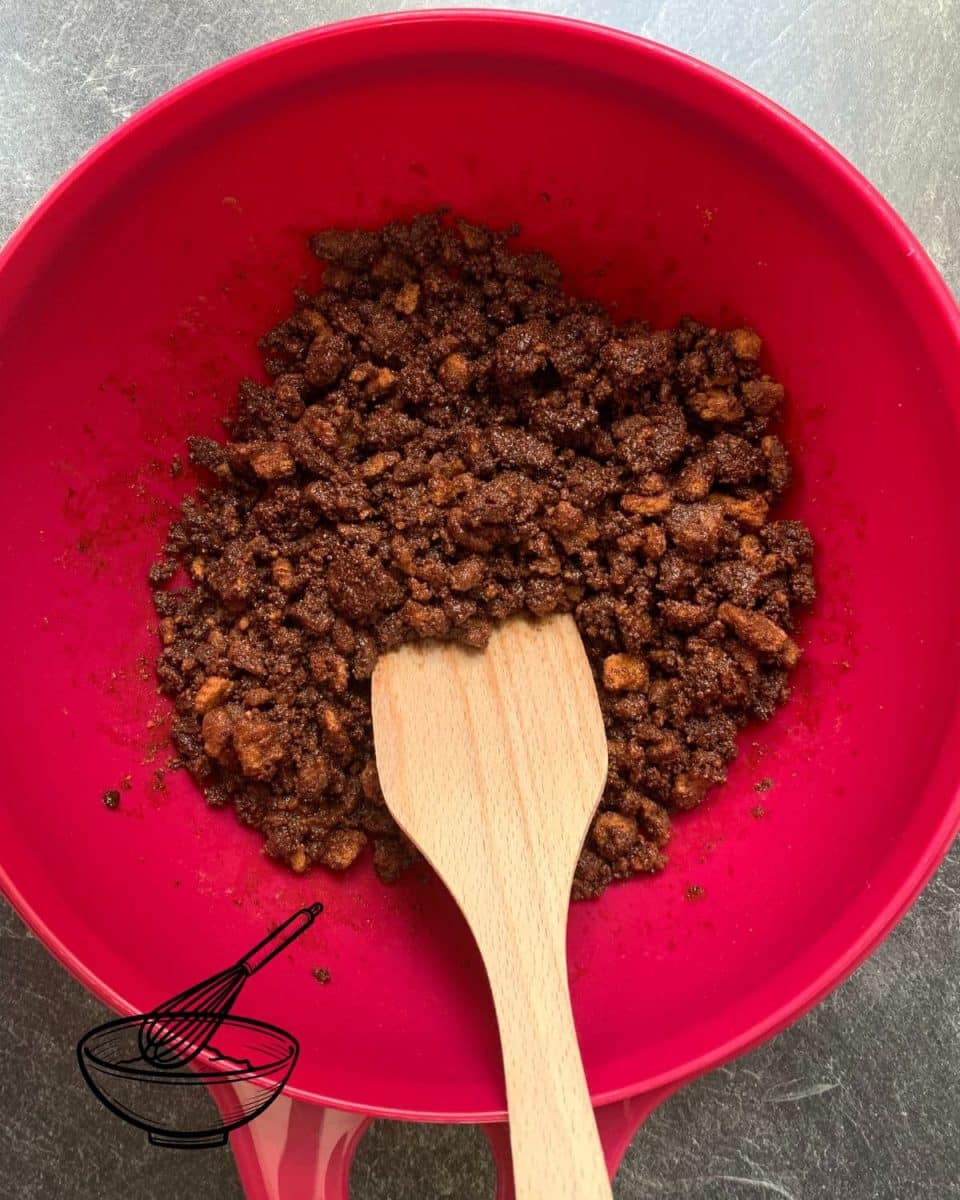
Fill half of the cookies into a sealable Ziploc bag and crush them with a meat tenderizer. Once only crumbs are left, open the Ziploc bag and empty the crumbs into a mixing bowl.
Repeat with the remaining cookies.
Next, add the unsweetened raw cocoa powder.


TIP: If not all of the cookies are crumbly, that’s fine and intended! Those bigger chunks will make a lovely crunchy texture later in the cake base.
Now pour the melted butter into the bowl and combine it well with the crushed Biscoff cookies and the cocoa powder.

Distribute the cookie mixture evenly in the springform pan.
Then press the mass a little firmly (I used a potato masher. That worked very well!) and put the form afterward in the fridge for cooling.
Preparing the Ricotta Cream and Putting it All Together
Blend the ricotta and sugar with a food processor until creamy. Pour in the whipped cream and blend for about 2 minutes until creamy and well combined.


Meanwhile, heat the milk in a saucepan (do not boil!). Squeeze the gelatin, dissolve it in the warm milk, and stir the milk-gelatin mixture into the ricotta mixture.
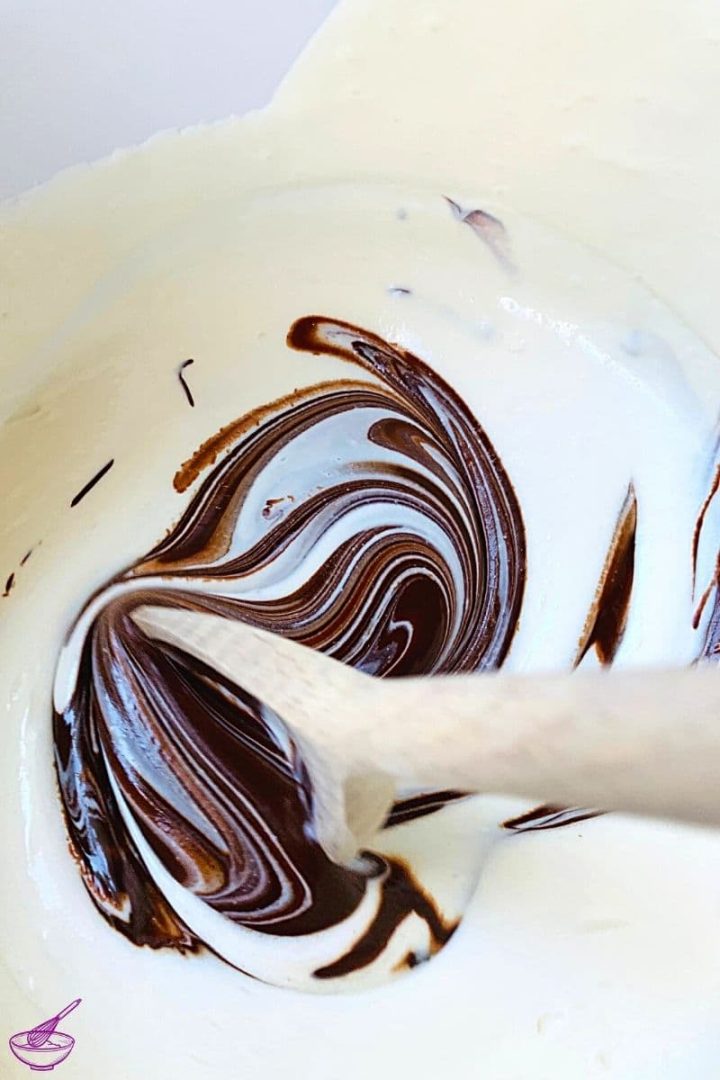
Now divide this mixture evenly between two mixing bowls. Pour the melted milk chocolate couverture into one of them and stir well to create a delicious cream.
Take the springform pan out of the fridge and pour the milk chocolate ricotta cream into it.
Spread it in the form and put it in the freezer for at least 10 minutes so that it becomes firm and you can easily make the second layer.


Mix the melted dark chocolate couverture with the second half of the ricotta mass and spread it carefully on the cooled milk chocolate cream.
Chill the cheesecake overnight in the refrigerator so that it can set.
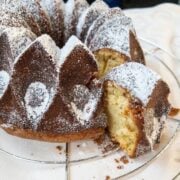
Decorating the Chocolate-Ricotta-Cheesecake before serving
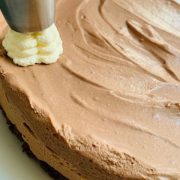
Just before serving, prepare the whipped cream for decorating. Pour the cream into a tall mixing bowl and add one teaspoon of cornstarch and one teaspoon of powdered sugar. Now mix the mixture with a hand mixer until it is firm.
As a substitute for cream stiffener, I use cornstarch and powdered sugar.
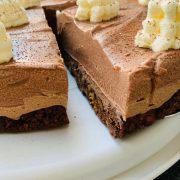
Take the chilled chocolate ricotta cheesecake out of the refrigerator. Open the springform pan and remove the strips of baking paper on the sides. Take a wide flipping shovel, carefully slide it between the cake and the baking paper and lift the cheesecake onto a serving platter or cake plate.

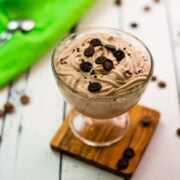
Fill the whipped cream into a pastry bag and decorate your cheesecake as you like.
Sprinkle the cheesecake with cocoa powder, cut it into equal pieces, and serve right away.


If you are a fan of Ricotta like me, try out our delicious Strawberry Cupcakes, with Ricotta Sponge or Chocolate Chip Ricotta Loaf Cake! Try out this fancy Toblerone cheesecake if you love no-bake cheesecakes, as much as I do!
🌡️ Storage
This cheesecake is best enjoyed right away. However, if something remains, you can store it in the fridge for a few days without any worries.
It’s best to put it under a cake bell to not pick up any smells from the refrigerator.
🍽 Equipment
- Ø 23 cm / 9-Inch Springform Pan
- Kitchen Machine
- Plastic Wrap
- Sandwich paper or baking paper
- Pastry Bag with a tip of your liking
- Small Sieve for dusting
- Wooden Spoon
- 3-4 Mixing Bowls
- Baine Marie for melting the couverture
- Electric Handmixer
- Small pan for melting the butter
- Plastic Ziploc bag (For fewer cookie crumbs in the kitchen)
- Meat Tenderizer (For smashing the cookies into crumbs)
- Potato Masher (To press the cookie crumbs into shape)
🙋🏻 FAQ
In this recipe, we use full-fat, soft ricotta cheese. We don’t recommend using reduced-fat ricotta, as it may produce a less creamy dessert. When you open your package, make sure to pour the water out before using the ricotta.
You can replace gelatin with Agar Agar, Carrageenan, Kuzu, Guar Gum, Xanthan Gum, or Arrowroot.
Fancy more delicious no-bake cheesecakes? Check out the following recipes:
- Fig Cheesecake in a Jar {no bake}
- No-bake Pumpkin Cheesecake
- No-bake White Chocolate Raspberry Cheesecake {Halloween}
- No-bake Mint Chocolate Cheesecake
- No-bake 4th of July Cheesecake
- No-bake Eggnog Cheesecake
- 5 ingredient mini Oreo Cheesecakes
- No-bake Strawberry Cheesecake
If you are looking for a creamy cake that is baked, why not try this delicious Single Layer Chocolate Nutella Cake?
No-Bake Chocolate Ricotta Cheesecake

Equipment
- Standmixer or electric handmixer
- Plastic Wrap
- Sandwich paper or baking paper
- Wooden spoon
Ingredients
Biscoff Cookie Crust
- 10.6 oz Lotus Biscoff Cookies halved
- 4 tbsp Unsweetened Cocoa Powder
- ½ cup Melted unsalted butter
Cream
- 2 cups Chocolate-Milk Couverture chopped
- 2 cups Dark Chocolate Couverture chopped
- 3 Sheets Gelatin
- 3 cups Ricotta
- ½ cup Granulated Sugar
- 1 ¼ cups Heavy Cream
- ¼ cup Milk
Decoration
- ⅞ cup Heavy Cream
- 1 tsp Cornstarch
- 1 tsp Powdered Sugar
- Unsweetened Cocoa Powder for dusting
Instructions
Necessary Preparations to save you time
- Line the springform pan with baking paper (cut to size on the bottom and sides). Set it aside.
- Melt ½ cup Melted unsalted butter in a small pan on low heat, and set up two water baths to melt 2 cups Chocolate-Milk Couverture and 2 cups Dark Chocolate Couverture separately.½ cup Melted unsalted butter, 2 cups Chocolate-Milk Couverture, 2 cups Dark Chocolate Couverture
- After melting the couverture completely, pour each into a separate bowl and let cool down a bit.
- Soak 3 Sheets Gelatin leaves in cold water.3 Sheets Gelatin
Making the delicious Biscoff cookie cake base
- Fill half of 10.6 oz Lotus Biscoff Cookies into a sealable Ziploc baggie and crush with a meat tenderizer. Once only crumbs are left, open the Ziploc bag and empty the crumbs into a mixing bowl. Repeat with the remaining Lotus Biscoff Cookies.10.6 oz Lotus Biscoff Cookies
- Now pour the melted butter into the cookie crumbs and add 4 tbsp Unsweetened Cocoa Powder. Stir well and distribute the mixture evenly in the springform pan. Then press the mass a little firmly (I used a potato masher. That worked very well!) and put the form afterward in the fridge for cooling.4 tbsp Unsweetened Cocoa Powder
Preparing the Cream and Putting it all Together
- Blend 3 cups Ricotta and ½ cup Granulated Sugar with a food processor until creamy. Pour in 1 ¼ cups Heavy Cream and blend for about 2 minutes until creamy.3 cups Ricotta, ½ cup Granulated Sugar, 1 ¼ cups Heavy Cream
- Meanwhile, heat ¼ cup Milk in a saucepan (do not boil!). Squeeze the gelatin, dissolve it in the warm milk, and stir the milk-gelatin mixture into the ricotta mixture.¼ cup Milk
- Now divide this mixture evenly between two mixing bowls. Pour the melted milk chocolate couverture into one of them and stir well to create a delicious cream.
- Take the springform pan out of the fridge and pour the milk chocolate ricotta cream into it.
- Spread it in the form and put it in the freezer for at least 10 minutes so that it becomes firm and you can easily make the second layer.
- Mix the melted dark chocolate couverture with the second half of the ricotta mass and spread it carefully on the cooled milk chocolate cream.
- Chill the cheesecake overnight in the refrigerator so that it can set.
Decorating the Chocolate-Ricotta-Cheesecake before serving
- Pour ⅞ cup Heavy Cream into a tall mixing bowl and add 1 tsp Cornstarch and 1 tsp Powdered Sugar. Now mix it with a hand mixer until it is firm.⅞ cup Heavy Cream, 1 tsp Cornstarch, 1 tsp Powdered Sugar
- Take the chilled chocolate ricotta cheesecake out of the refrigerator. Open the springform pan and remove the strips of baking paper on the sides. Take a wide flipping shovel, carefully slide it between the cake and the baking paper and lift the cheesecake onto a serving platter or cake plate.
- Fill the whipped cream into a pastry bag and decorate your cheesecake as you like.
- Sprinkle the cheesecake with Unsweetened Cocoa Powder, cut it into equal pieces and serve immediately.Unsweetened Cocoa Powder
Nutrition
🤎 You might also like
⛑️ Food Safety
- Cook to a minimum temperature of 165 °F (74 °C)
- Do not use the same utensils on cooked food, that previously touched raw meat
- Wash hands after touching raw meat
- Don’t leave food sitting out at room temperature for extended periods
- Never leave cooking food unattended
- Use oils with high smoking point to avoid harmful compounds
- Always have good ventilation when using a gas stove
For further information, check Safe Food Handling – FDA.
This cheesecake looks fantastic. The texture is amazing. I just saved the recipe. I will make it this weekend.
I absolutely love Biscoff cookies so this is the perfect dessert for me. I love trying new versions of foods and I’ve never tried making cheesecake with ricotta cheese before. It sounds like the most heavenly delicious treat, I can’t wait to try it.
Thank you, Lucy! I love using ricotta because it’s not quite as fatty and gives such an incomparable flavor!
Wow, this chocolate cheesecake sounds amazing. I love ricotta and chocolate but have never used them together, so I’ve gotta try this. Do you think it will work out being cooked in my Instant Pot since I don’t have an oven?
Thank you, Kristina! If you’re referring to melting the chocolate, you can of course use the Instant Pot for that. Otherwise, this lovely cheesecake is no-bake! So, no worries 🙂
So decadent and delicious. I love biscoff cookies. Combine that with chocolate and cheesecake? Irresistible!
Biscoff cookies are so delicious! I love to include them as often as possible!
What a delicious cheesecake. It’s so tempting, inviting. I have to make it this weekend. Yum!
That’s wonderful to hear! Please tell me how you liked it!